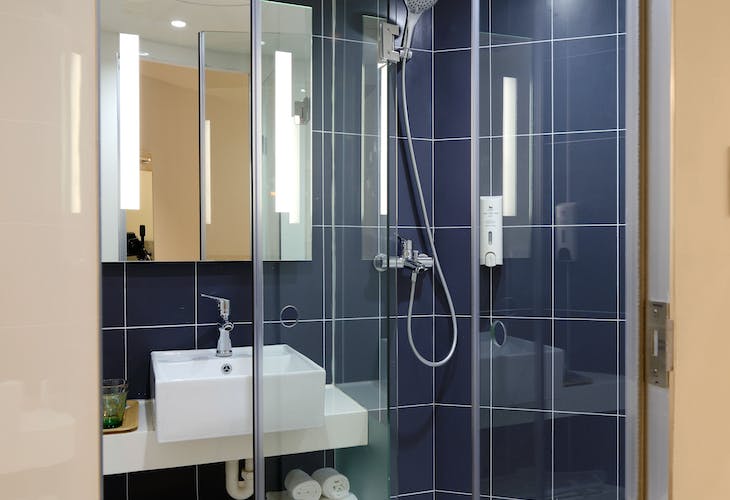
Glass shower doors add a touch of elegance and spaciousness to any bathroom, but their performance and aesthetic appeal rely heavily on a small yet critical component: the shower door seal. These seals serve an essential purpose, ensuring that water remains within the shower area, protecting your bathroom from unwanted splashes, and maintaining the enclosure's functionality and hygiene. Neglecting these seals can lead to a cascade of problems that are both inconvenient and potentially costly.
Primarily, the seal acts as a barricade against water leakage. Without a properly functioning seal, water can escape the shower area, leading to potential water damage in surrounding areas, such as walls and flooring. This can weaken structural integrity over time, encourage the growth of mold and mildew, and lead to unsightly stains. Furthermore, water seepage may compromise other bathroom fixtures and even seep into adjacent rooms, causing damage beyond the bathroom itself.
Additionally, a compromised seal diminishes the shower door's aesthetic value. Hard water, soap residue, and cleaning chemicals can cause the seals to discolor, crack, or even shrink, affecting the overall clean and clear appearance of your glass shower enclosure. Not only does this detract from the room’s visual appeal, but it also signals that the seal's effectiveness is compromised.
To avoid these issues, it’s essential to maintain a routine check on the condition of your shower door seals. A monthly examination is a good rule of thumb for most households, but this can vary based on the frequency of use and the level of water exposure. During these checks, one should look for signs of wear and tear, such as cracking, brittleness, or discoloration, which can indicate the need for a seal replacement or a deeper clean.
Routine maintenance of shower door seals is not just about addressing current problems; it’s a preventive measure that prolongs the life of the shower door itself. By keeping the seals in good condition, you ensure that they continue to perform their primary function effectively, thereby extending the period between replacements. This saves you time, money, and the inconvenience of dealing with water damage, all the while keeping your glass shower door looking as pristine as the day it was installed.
Maintaining the integrity of your shower door seals doesn't require an inordinate amount of time or resources, but it does require regular attention. A seal that is well cared for will serve its purpose faithfully, preventing minor nuisances from escalating into major headaches. By fostering a habit of consistent seal maintenance, you contribute to the longevity and performance of not just the shower door but your entire bathroom.
Identifying Common Issues with Shower Door Seals
Recognizing the visible signs that indicate a need for shower door seal replacement or repair is crucial in maintaining a functional and aesthetically pleasing bathroom. Homeowners should be vigilant in checking for these indications to avoid the inconveniences and potential costs associated with water leakage and damage.
One clear sign that a shower door seal might require attention is the presence of gaps or spaces between the seal and the glass or between the seal and the shower enclosure. These gaps can permit water to escape, defeating the purpose of the seal. Another symptom to be on alert for is the condition of the seal's material itself. Over time, the rubber or vinyl that composes most shower door seals can degrade. Indicators of this deterioration include hardening, cracking, or turning brittle, which diminishes the seal's effectiveness.
Discoloration of the seal can also point towards potential issues. Seals can change color for various reasons, including the buildup of mold or mildew, which thrives in the warm and moist environment of a bathroom. In addition to being unsightly, mold on a shower seal can pose health risks and suggest that the seal's integrity is compromised.
Additionally, the seal may start to peel away or come loose from the door or frame. This detachment can be a consequence of the adhesive breaking down or the fasteners failing, a situation that often arises from constant use or the natural aging process of the materials.
The factors contributing to these issues range from environmental to chemical. For instance, exposure to harsh cleaning chemicals can accelerate the degradation of shower door seals. Products containing bleach or ammonia can be particularly detrimental, as they can cause the seal material to weaken or break down faster than it normally would. Furthermore, frequent use of a shower door can expedite the wear and tear process; repeated opening and closing can strain the seal, leading to quicker loss of elasticity and structural integrity.
To diagnose seal integrity effectively, homeowners should conduct regular visual and physical examinations of their shower door seals. Running a finger along the seal can help detect any irregularities in the material's texture or resilience. For a more comprehensive check, one can gently press on different sections of the seal to test for its ability to bounce back into place – a sign of good flexibility. Water tests, where a small amount of water is sprayed directly onto the seal to observe for leaks, can also help in determining if the seal is still performing its role efficiently.
Such vigilance in monitoring the health of shower door seals can aid in early detection of problems, allowing for timely repair or replacement before more significant issues arise. By understanding these visual cues and contributing factors, homeowners can ensure the long-term functionality and appeal of their shower enclosures.
Tools Duty's Expert Maintenance Tips
When it comes to keeping glass shower door seals in peak condition, the adage "an ounce of prevention is worth a pound of cure" could not be more apt. Tools Duty, a leader in home services, offers a wealth of expertise that helps extend the life of your shower door seals with practical maintenance strategies.
Starting with cleaning frequency, the ideal routine is a balance between thorough and gentle. Shower door seals should be wiped down after every use to prevent water spots and reduce the buildup of soap scum and mildew. This simple daily wipe-down can involve nothing more than a squeegee or a soft microfiber cloth to remove excess moisture and residues.
For a deeper clean, which is necessary to maintain the integrity of the seal and prevent mold growth, Tools Duty recommends a weekly regimen. Create a diluted solution of equal parts white vinegar and water, which is effective at breaking down grime without harsh chemicals that can degrade the seal. Apply the solution using a soft brush to gently scrub the seal, being careful not to use excessive force that might cause damage. If you encounter stubborn mold or mildew, adding baking soda to the mix can provide a mild abrasive action that can help remove these without harming the seal.
In addition to cleaning, inspecting the seal for any signs of wear or damage should be part of your regular maintenance. Small issues like slight separations or tears can quickly become bigger problems if left unaddressed. Catching these early means a simple fix rather than a full seal replacement.
Window Utopia also emphasizes the importance of using the right products when cleaning the seal and the glass door. Stay away from abrasive cleaners, scouring pads, or any sharp tools that can scratch or cut the seal. Instead, opt for pH-neutral cleaners specifically designed for use on bathroom seals and glass. This ensures that the cleaning agents will remove dirt and soap scum effectively without compromising the seal's material.
Another tip for preserving your shower door seal is to avoid letting bar soap residue accumulate on the seal. Liquid body wash is a better option as it is less likely to leave a film that can contribute to the deterioration of the seal.
It’s worth mentioning that while maintaining the seal, homeowners should not neglect the track or metal frame, as these are part of the support system for the seal. A soft-bristled brush can be used to clear the tracks of any debris or buildup, and a small amount of silicone lubricant can be applied to the tracks to facilitate smooth door movement. However, be cautious not to apply silicone directly to the seal, as it can attract dirt and cause the seal to deteriorate faster.
In addition, always ensure that your bathroom is well-ventilated. Excess humidity can accelerate the deterioration of shower door seals, so consider using an exhaust fan or opening a window to aid in moisture control.
When it’s time for a replacement, knowing the different types of shower door seals available is just as critical as maintenance. Seals are not a one-size-fits-all solution. The right type of seal not only ensures a water-tight enclosure but also contributes to the longevity of the door mechanism itself. Shower door seals come in various shapes and sizes, each designed to fit different glass thicknesses and door configurations. Some popular types of seals include magnetic strips for doors that close together, bulb seals for cushioning between the door and the frame, and fins or sweeps that direct water back into the shower.
Staying abreast with the latest trends, the industry has seen advances in seal materials to offer homeowners improved durability and functionality. For example, some modern seals incorporate antimicrobial properties that inhibit the growth of mold and mildew, making them easier to clean and maintain.
Tools Duty understands that each bathroom setup may have unique requirements. Hence, their expertise extends to custom-fitting seals to guarantee the best performance. When considering replacement, it is advised to measure the glass thickness and the gap that needs sealing accurately. This ensures that the new seal will provide optimal water retention and reduce the likelihood of future leaks.
By following these maintenance tips from Tools Duty, homeowners can assure that their shower door seals remain functional and in good shape, ultimately protecting their investment in a pristine bathroom environment.

Choosing the Right Replacement Seals
Choosing the appropriate replacement seals for your glass shower door is a critical decision that can significantly influence the effectiveness and durability of your shower enclosure. The right seals not only guarantee a watertight seal but also contribute to the longevity of the entire shower door system. As an expert in home services, Tools Duty emphasizes the importance of understanding the criteria for selecting high-quality replacement seals and recognizing the advancements in seal technology that have emerged in recent years.
The primary criteria for selecting replacement shower door seals include compatibility with the door design, material quality, and the specific functional requirements of the shower enclosure. Firstly, one must ascertain the type of seal required based on the glass thickness and the design of the door. Frameless shower doors often require different seals than framed ones due to the lack of a supporting frame and the direct attachment of the seal to the glass edge.
Material quality is paramount when selecting a new seal. The most commonly used materials are PVC (Polyvinyl Chloride) and TPE (Thermoplastic Elastomers). High-quality seals are typically made from TPE, which offers better flexibility and durability than standard PVC. This material is also more resistant to the temperature variations and chemical exposures found in bathroom environments. When selecting a seal, it is essential to consider its resistance to UV light, as some bathroom setups are exposed to natural light which can cause inferior materials to degrade over time.
The seal's design also plays a significant role in its effectiveness. Advances in seal technology have led to designs with features such as fins or sweeps that effectively channel water back into the shower area, preventing leaks and spillage onto the bathroom floor. Some modern seals incorporate additional elements like magnetic strips that provide a stronger bond between the door and its frame or adjacent glass panel, thereby enhancing the enclosure's overall water-tightness.
In recent times, there has been a notable shift towards eco-friendly and health-conscious materials in the production of shower seals. Manufacturers are now offering options that are free from harmful phthalates, a group of chemicals often used to soften plastics but are linked to health risks. New seals are also incorporating antimicrobial properties to hinder the growth of mold and bacteria, a critical consideration in the warm, moist conditions of a shower.
When choosing a replacement shower door seal, it's essential to also account for the ease of installation and maintenance. The latest seal designs have aimed to simplify these processes, allowing homeowners to perform replacements without specialized tools or excessive effort. Easy-to-clean features, such as a smooth surface that prevents the accumulation of soap scum and hard water deposits, ensure that the seals remain transparent and attractive with minimal upkeep.
Moreover, it’s beneficial to select seals that align with the design aesthetic of the bathroom. Many modern seals are available in various finishes and colors to complement the décor, maintaining the stylistic integrity of the space while serving their practical purpose. This consideration is particularly relevant given the increasing emphasis on bathroom design as an extension of overall home aesthetics, as noted in recent trends.
In summary, the selection of a high-quality replacement seal is dependent on a combination of factors: the accurate assessment of the shower door's specifications, a thorough understanding of material properties, and a keen eye for the advancements in design that can enhance both functionality and style. Tools Duty’s expertise in these areas ensures that homeowners are equipped with the knowledge to make informed decisions that will uphold the integrity and longevity of their glass shower door systems.
Advancements in technology and design have made it possible for homeowners to easily undertake tasks such as replacing shower door seals with assurance. The following section will offer a user-friendly, comprehensive step-by-step guide that empowers even those without professional expertise to perform such replacements with confidence and achieve results akin to those of a seasoned handyman.
Step-by-Step Guide to Replacing Shower Door Seals
When the time comes for you to replace your shower door seals, the process might seem daunting, but with the right guidance, anyone can ensure a watertight fit and give their shower enclosure a fresh lease on life. Here's an easy-to-follow tutorial on how to replace your shower door seals, including tips to avoid common installation mistakes.
Materials and Tools Required:
New shower door seal
Measuring tape
Scissors or a sharp utility knife
Mildew-resistant silicone sealant (optional)
Cleaning supplies (rubbing alcohol or glass cleaner and a lint-free cloth)
Gloves (for cleanliness and protection)
Step 1: Measure and Purchase the Correct Seal
Firstly, measure the thickness of your glass door and the length of the area where the seal needs to be installed. Purchase a seal that matches these measurements. Seals come in different profiles to match different door designs, such as magnetic, bulb, and fin seals, so ensure you choose one that aligns with your specific needs.
Step 2: Remove the Old Seal
Gently pull the old seal away from the door, starting from one end. If the seal is stuck, you may use a flat tool like a putty knife to carefully lift it without damaging the glass.
Step 3: Clean the Area
Use rubbing alcohol or a glass cleaner to thoroughly clean the area where the new seal will be placed. This ensures the best adhesion and a clean appearance. Let the area dry completely.
Step 4: Cut the Seal to Length
Using the measurements you took earlier, cut the new seal to the correct length with scissors or a utility knife. It's better to cut slightly longer than too short; you can always trim it down further if necessary.
Step 5: Test-Fit the Seal
Before proceeding to the installation, do a dry test-fit. This will help you confirm that the seal fits snugly and allows you to make any necessary adjustments before the final installation.
Step 6: Install the Seal
Gently press the seal onto the edge of the door. Start from one end and work your way to the other, ensuring that the seal is straight and firmly in place. If your seal design requires it, you may apply a thin line of mildew-resistant silicone sealant into the seal's groove before fitting it onto the door for an extra watertight bond.
Step 7: Check for Gaps and Alignment
Once installed, close the door to check for any gaps between the seal and the door frame or another panel. Adjust as needed to ensure a perfect, watertight fit. If the door does not close properly, or if there's resistance, the seal might be too thick, and you'll need to adjust the installation.
Tips to Ensure a Watertight Fit:
Do not stretch the seal during installation, as this can cause gaps once it relaxes back into its natural shape.
For seals with fins or sweeps, ensure they are facing the correct direction to channel water back into the shower.
If using a seal with a magnetic strip, confirm that the polarity aligns with the opposing magnet for a strong closure.
Avoiding Common Mistakes:
Do not use oil-based cleaners when preparing the glass; they can leave a residue that prevents the seal from adhering properly.
Avoid cutting the seal on the door itself, as a slip could scratch or damage the glass.
Take care not to apply too much pressure when fitting the seal to avoid cracking the glass.
Replacing your shower door seal is a proactive step in maintaining your shower enclosure. A new seal not only prevents leaks but also refreshes the look of your bathroom. By following these steps, you can confidently complete this task, ensuring a functional and visually appealing result.
In our experience at Tools Duty, paying attention to the details during seal replacement makes all the difference. Ensuring the correct profile and fit prevents common post-installation problems such as water leakage or door misalignment. We’ve seen how taking these simple steps can prolong the life of a shower enclosure and keep it performing at its best.
This part of the article presents a short case study showcasing how Tools Duty successfully applied the maintenance strategies discussed. It offers insights into the problems faced, the solutions implemented, and the outcomes achieved, serving as a testimony to the company's expertise.
Shower Door Pros Case Study: A Success Story
In the realm of bathroom maintenance, few challenges are as persistent as those involving glass shower door seals. Over time, the seals can deteriorate, leading to leaks, drafts, and the unsightly accumulation of mold and mildew. It is against this backdrop that the expertise of Shower Pros shines.
One particularly illustrative case involved the Murphy family, whose master bathroom had begun to show signs of seal degradation. The clear silicone seals, once pristine and pliable, had discolored to a yellowish hue and stiffened, compromising the watertight integrity of their frameless glass shower enclosure. The resultant water seepage had begun to affect the surrounding tile grout and baseboards, creating both a safety hazard and an eyesore.
The Murphys reached out to Shower Pros after a frustrating battle with DIY fixes that proved to be short-lived solutions. Our initial inspection confirmed that the problem was not just with the seal itself but also with the build-up of minerals from hard water, which had made the seals less effective.
The Shower Door Pros approach was multifaceted. Firstly, we recognized that simply replacing the old, worn seals wouldn't suffice in the long term if the underlying causes weren't addressed. Therefore, we began with a thorough cleaning of the area using specialized solutions designed to break down mineral deposits and mold growth without damaging the glass or tile.
Next, we removed the old seals with precision, ensuring that the glass was not compromised in the process. After cleaning the glass edges, Shower Door Pros technicians meticulously measured and cut the new seals, which were chosen from high-grade silicone materials that boasted enhanced resistance to the rigors of daily shower use.
Upon installation of the new seals, we applied a narrow bead of advanced formula silicone sealant to provide a secure, watertight bond that also allowed for the slight flexing necessary for door operation. This specific product was selected for its mildew-resistant properties, addressing one of the key issues the Murphys faced with their previous setup.
But the true hallmark of Shower Door Pros approach was in our attention to the details. We ensured that the new bottom sweep had just the right amount of clearance to prevent water from escaping while allowing the door to glide smoothly without dragging. Additionally, the vertical seals were fitted so that their magnetic strips aligned perfectly, ensuring a firm seal upon closure.
The results were readily apparent. Post-installation, the Murphys noticed a significant improvement not only in the functionality of their shower door but also in the overall aesthetic of their bathroom. Where once there had been signs of water damage and mold, there was now a clean, clear enclosure that seemed almost to glow. The Murphys were equally impressed by the absence of the mildew scent that had plagued their bathroom for months.
Moreover, Shower Door Pros tailored approach brought peace of mind to the Murphy family. They no longer had to concern themselves with frequent checks for leaks or cope with the recurring sight of mildew. The new seals promised longevity and performance, backed by Shower Door Pros quality workmanship and selection of optimal materials.
This case effectively demonstrates how Shower Door Pros comprehensive strategies for maintaining glass shower door seals can lead to significantly improved outcomes. The company's precise and thoughtful techniques, combined with high-quality materials and a client-focused approach, stand as a testament to its expertise in extending the life and beauty of shower enclosures.
Taking the conversation forward, let's weigh the pros and cons of professional maintenance services against the DIY approach. Knowledge is the homeowner's most potent tool, and understanding which path to take can be crucial in achieving a balance between cost-effectiveness and the assurance of quality work. Whether homeowners should call in experts like those at Shower Door Pros or tackle the task themselves depends on various factors, which are worth exploring in greater depth.
Professional Versus DIY Maintenance
Whether to entrust the maintenance of your glass shower door seals to professionals like those at Tools Duty or to embark on a DIY journey is a pivotal decision with both immediate and long-term implications for your bathroom's functionality and appearance. Each route carries its unique set of advantages and challenges that homeowners should carefully consider.
Professional Maintenance: The Advantages
Professionals, such as the skilled technicians at Tools Duty, offer extensive expertise that assures precise and long-lasting results. With years of experience under their belts, they can swiftly diagnose issues that might not be apparent to the untrained eye. This proficiency is critical when dealing with intricate installations or when a seal's failure points to larger underlying issues, such as structural inconsistencies or improper door alignment.
The tools and materials used by professional services are typically of higher quality and efficiency than what might be available to the average homeowner. They have access to industrial-grade cleaning agents and the latest sealant technologies that promise stronger, more durable bonds and resistance to the mold and mildew prevalent in moist bathroom environments. Additionally, their replacements are often backed by warranties, offering peace of mind that the job is safeguarded against defects or premature wear.
Moreover, engaging a professional service is a time-saver. The entire process, from assessment to completion, is streamlined, leaving homeowners free to attend to other obligations. For busy individuals or those who find the physical demands of maintenance work challenging, this aspect alone can be a significant draw.
The Drawbacks of Professional Services
Cost is often the primary deterrent for homeowners considering professional maintenance services. While investing in professional expertise does have long-term benefits, the immediate outlay can be significant compared to the cost of DIY repairs. Moreover, depending on the nature of the task and the service provider's pricing structure, even minor maintenance work can carry a sizable price tag.
Scheduling can also be a limitation. Arranging a suitable time for technicians to inspect and repair your shower may introduce delays, especially if the company is in high demand. This can be particularly inconvenient when facing urgent maintenance needs.
DIY Maintenance: The Advantages
DIY enthusiasts can leverage a wealth of online resources, tutorials, and community forums that provide step-by-step guidance for almost every aspect of shower door seal maintenance. This democratization of knowledge allows homeowners to tackle many of the common problems themselves, from cleaning and minor adjustments to complete seal replacements.
Undertaking DIY maintenance can also be rewarding, fostering a sense of achievement and self-reliance. It offers a hands-on learning experience that, over time, builds a valuable skill set. For those who enjoy home improvement projects, the process can be as gratifying as the end result.
The cost-effectiveness of DIY approaches is undeniably appealing. By eliminating labor costs and opting for off-the-shelf materials, the financial burden of maintaining your shower seals can be dramatically reduced.
The Drawbacks of DIY Maintenance
However, the flip side to the cost benefits of DIY lies in the potential for errors. Without the seasoned expertise of a professional, misdiagnosis of issues or incorrect installations can lead to further damage and, consequently, more expenses. High-quality tools and materials, which are readily available to professionals, can be cost-prohibitive for the average homeowner, leading to compromises that may affect the integrity of the repair.
Skill level is another critical factor. Some tasks may seem straightforward in tutorial videos but can be quite complex in practice. Without the proper tools or understanding of the nuances involved, there is a risk of suboptimal outcomes or even injury.
Before embarking on DIY maintenance or calling in the pros, homeowners should consider the complexity of the issue at hand, the tools and skills at their disposal, and the time and resources they are willing to invest. In many cases, the optimal path is not an 'either-or' but a hybrid approach—undertaking simple, routine maintenance oneself and reserving the more challenging tasks for professional services like Tools Duty. This balanced strategy ensures both the integrity of the shower enclosure and the efficient use of resources.
Preventive Measures to Extend Seal Life
Moving forward, it is also beneficial for homeowners to adopt preventive measures...
Preventive Measures to Extend Seal Life
It is vital to remember that the longevity of glass shower door seals often hinges on the preventative actions taken regularly. Here are some essential tips and best practices designed to minimize the wear and tear on these crucial components, ultimately ensuring that they continue to function at their best.
Monitor Humidity Levels
Bathrooms are naturally high-humidity environments, which can accelerate the deterioration of shower door seals. To combat this, it's important to maintain proper ventilation. Use exhaust fans during and after showers to help remove moist air from the room. Leaving the door open when the shower is not in use can also promote air circulation, further reducing the potential for mold and mildew accumulation, which can break down the seal materials over time.
Gentle Use
The manner in which shower doors are handled can significantly impact the seal's integrity. Encourage gentle opening and closing to avoid undue stress and wear. Slamming or forcing the door can not only damage the seals but also the glass and hardware. Regularly check the door alignment and make sure that the doors are properly hung, as misaligned doors can put extra pressure on seals and fasteners.
Clean Regularly and Correctly
Routine cleaning of the shower door seals is imperative; however, it is crucial to select the right cleaning products. Harsh chemicals and abrasive tools can cause more harm than good, eroding the seal material and scratch the glass. Instead, opt for a mixture of warm water and mild soap or a solution of white vinegar and water. Use a soft microfiber cloth to gently wipe down the seals. Avoid spray cleaners that contain bleach or ammonia as these substances can weaken the seal.
Protect Against Chemicals
Be cautious about the chemicals that are used in the bathroom. Hair products, cleaning agents, and even certain types of bar soaps can leave behind residues that degrade the quality of the shower door seals. After using such products, rinsing the shower area thoroughly can help to prevent these chemicals from settling on the seals.
Keep the Shower Dry
After each use, take a few moments to dry the shower door seals with a clean towel or squeegee. This simple practice can prevent water from sitting on the seal for prolonged periods, which is a common cause of decay. Additionally, it helps to keep the shower space free from hard water stains and buildup.
Inspect and Replace as Needed
Despite the best maintenance efforts, shower door seals will eventually wear out. Regular inspections can catch problems early before they lead to leaks or further damage. Look for signs of cracking, discoloration, or brittleness. When it's time for a replacement, choose quality seals that match the specific needs of your shower door and are designed to withstand the rigors of bathroom conditions.
Avoid DIY Fixes that Cause Damage
While it can be tempting to use adhesives or other household items to 'fix' loose or damaged seals, such improvised solutions can create more problems. They may not withstand the moisture and temperatures of the bathroom environment and can cause irreparable damage to both the glass and the frame. If the seal is not functioning as it should, it's better to replace it than to attempt a temporary fix.
Seek Professional Advice
When in doubt, consult with professionals like those at Tools Duty. They can provide expert advice on the care and replacement of shower door seals and help ensure you are using the best products and techniques to maintain them.
Adhering to these preventive measures can significantly reduce the frequency of replacements and maintain the pristine condition of your glass shower door seals. With the right care and attention, you can enhance the bathroom's aesthetic, preserve the functionality of your shower doors, and ensure a watertight enclosure for years to come.
Next, let's move on to troubleshooting common seal issues, as this is an inevitable part of maintaining your shower doors.
Troubleshooting Common Seal Issues
Despite meticulous maintenance, shower door seals may encounter problems such as minor leaks, seal displacement, or stickiness. Addressing these common issues promptly can prevent further damage and save you from costly repairs or replacements. Here’s a troubleshooting guide to assist you in managing these situations safely and effectively at home.
Dealing with Minor Leaks
Minor leaks in your shower door often originate from worn or improperly positioned seals. To address these leaks:
Inspect the Seal: Examine the full length of the shower door seal for any signs of damage or wear, such as cracks, tears, or areas where it has flattened and lost its elasticity. Such wear could compromise the seal's effectiveness.
Clean the Area: Before any adjustments, clean the seal and the area around it thoroughly, as debris or buildup can affect the seal's function. Use a soft cloth and a mixture of mild soap and water, or a half-water, half-vinegar solution for a more natural cleaning method.
Reposition the Seal: If the seal is intact but has slipped out of place, carefully slide it back into the correct position. You may need to loosen any fasteners or gently pry the seal away from the glass with a plastic putty knife if it has adhered to the surface.
Apply Sealant: In cases where the seal is slightly damaged but not beyond use, applying a clear silicone sealant can fill in small gaps or tears. Make sure the area is dry before application and allow the sealant to cure for the time specified by the manufacturer.
Replace the Seal: If the seal is beyond repair, measure the glass thickness and length required before purchasing a new seal. Clean the glass edge where the seal will sit, and install the new seal by pressing it firmly onto the glass edge, starting at one end and working your way to the other.
Addressing Seal Displacement
If you find that the shower door seal has become displaced, follow these steps:
Check the Track: Ensure that the shower door track or frame is free from grime that might prevent the seal from sitting correctly. Clean it with a specialized track cleaning brush or an old toothbrush.
Realign the Door: Misalignment of the shower door can lead to the displacement of the seal. Check that all hinges and fasteners are tight and adjust as needed to ensure that the door hangs straight.
Replace Stripped Parts: If any screws or components have been stripped, causing instability in the door's alignment, replace them to help the door and seal maintain their proper positions.
Fixing Stickiness
Stickiness on shower door seals can be the result of soap scum, mildew, or rubber degradation. To remedy sticky seals:
Clean Thoroughly: Use a gentle cleaning solution of baking soda and water to scrub the sticky areas. This will help remove any buildup without damaging the rubber.
Dry Completely: After cleaning, make sure the seals are completely dried. Persistent moisture can contribute to stickiness and encourage the growth of mildew.
Apply a Rubber Conditioner: There are products specifically designed to rejuvenate rubber, which can help reduce stickiness and restore some pliability to the seal. Follow the manufacturer's instructions when applying.
With these troubleshooting tips, you can address common shower door seal issues quickly and extend the life of your seals. However, if you encounter persistent problems or are unsure about any part of the process, seeking professional assistance is always a safe and reliable option.
Moving forward, it's essential to remember that the key to effective maintenance is regularity and attention to detail. The life of your shower door seals can be considerably prolonged through the practices outlined, saving you from the inconvenience and expense of premature replacements.
Ending the article on a high note, here is a valuable tip from Tools Duty that can significantly aid in maintaining glass shower door seals: After cleaning and drying your shower door seals, consider applying a thin layer of petroleum jelly to the seals. This can help maintain the rubber's elasticity, prevent it from drying out, and reduce the likelihood of cracks and leaks forming. It's a simple yet effective insider secret that reflects Tools Duty's dedication to providing customers with practical solutions for home maintenance.
Valuable Tip from Tools Duty
In the realm of glass shower door upkeep, the secret to longevity often lies in the smallest of details. From the vast array of tips and hacks, Tools Duty has unearthed a unique maintenance gem that might come as a revelation to many. This simple yet effective advice can drastically improve the condition of your shower door seals with minimal effort and is a testament to Tools Duty's deep understanding of home maintenance intricacies.
Picture this scenario: you step into your shower, ready for a refreshing start or end to your day, but instead of focusing on relaxation, your eyes catch sight of the seal around your glass shower door. It looks slightly worn, perhaps not as supple as it once was. Here lies the perfect opportunity to apply Tools Duty's signature tip—lubricating the seal with a small amount of silicone-based lubricant. Unlike petroleum-based products, which can degrade the rubber over time, a silicone-based lubricant will not only preserve the rubber's condition but also improve its seal and ease of movement.
The application process is straightforward:
Thoroughly Clean the Seal: Before the application of any product, make sure to clean the seal using a gentle cleaner that removes any soap scum, mold, or mildew without causing damage. Dry the seal completely after cleaning.
Apply the Lubricant: Using a silicone-based lubricant, apply a small amount onto a clean cloth. Gently run the cloth along the entire length of the seal, ensuring you cover all areas without over-saturating.
Wipe Away Excess: After application, ensure there's no excess lubricant that might seep into areas where it's not intended. A clean, dry cloth can be used to carefully remove any surplus product.
Regular Reapplication: For best results, this process should be carried out every few months. It will depend on the frequency of use and the level of exposure to moisture, but as a rule of thumb, once a seal starts looking less than vibrant, it's time for another application.
The benefits of such a simple act of maintenance are multi-faceted. Firstly, the lubricant ensures that the seal remains flexible and elastic, thus maintaining an effective barrier against water. This reduces the risk of leaks, which can cause water damage to the bathroom floor and adjacent structures. Secondly, a seal that moves smoothly is less likely to suffer from tears or breakage caused by friction when the door is opened or closed. Lastly, this lubrication acts as an additional layer of protection against the buildup of soap scum and hard water stains, making the seal easier to clean in the future.
It's a hallmark of Tools Duty to discover and share such practical wisdom that turns routine maintenance into a breeze. In the bustling flow of daily life, this tip is a minor adjustment with major rewards, a quiet revolution in the maintenance of a household staple. As glass shower doors stand as silent guardians against water spillage, taking the time to treat their seals with care is not just maintenance—it’s a nod to the finer aspects of home care and longevity.
And so, with this expert piece of advice from Tools Duty, the act of shower door seal maintenance transitions from a mundane chore to an act of preservation, ensuring that every component of the bathroom remains functional and pristine. With just a dab of silicone-based lubricant, homeowners are equipped to protect their investment and sustain the unblemished appearance of their shower sanctuary.